Customers
Capturing information about your customers isn't easy, especially when it comes to payments and history. With MX™ Merchant it is all in one place for you.
Please Note
Only the admin and supervisors can see these settings.
What You'll See
This page is broken up by the following sections:
- Customize your Customers
- Spending Profiles
- Customer Database
Customize Your Customers
Custom fields can be used to capture additional data on your customers. There are no boundaries to their use, so if you feel there is something important to add or see custom fields are perfect for you. There is a limit so only 10 custom fields can be created.
To create a new custom field simply click the green +Add Custom Field button.

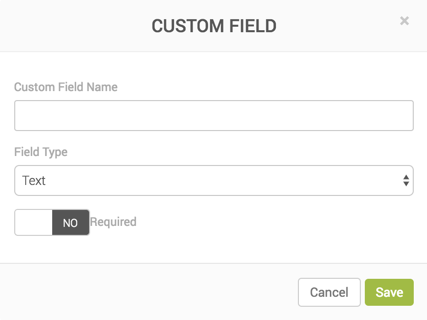
Now you will see the pop-up below with the following fields:
- Custom Field Name - Name of the information you want to collect
- Field Type - What is allowed as a response to the field
- Text - Free form text box
- Yes/No - User can only choose from yes or no to answer
- Number - any number can be entered in the field (0-9)
- Decimal - a number and decimal can be entered in the field
- List - you can create a predefined list for the user to choose from answering
- Required - Yes or no. If yes every time you create a new customer it will ask you to complete the custom field
To edit an existing custom field simply click on the blue words under the 'Custom Field Name' column in settings.

Spending Profiles
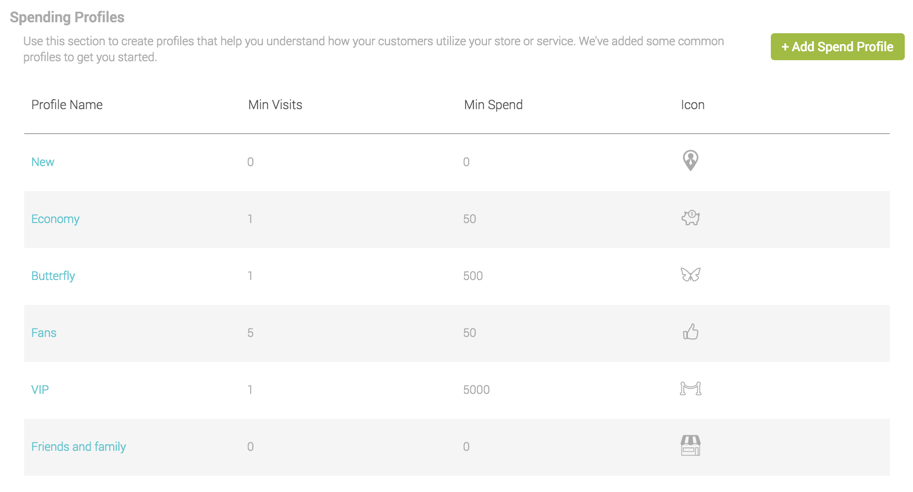
Spending profiles are used to organize your customers based on their spending habits within your business. Spend profiles are automatically calculating the sales and visit for each customer when a payment is made so you don't have to. That is why it is so important to add the customer name to the payments. As a default you have 6 spend profiles created for you, however, you can change them to better fit your business.

If a customer falls into more than one spend category, the priority or ranking of the profile determines their customer spend profile. To change the rank simply put your mouse on the row you would like to move, click and drag to the desired rank. To delete or modify an existing profile, click on the blue text found under the Profile Name column. To create a new profile click the green +Add Spend Profile button.

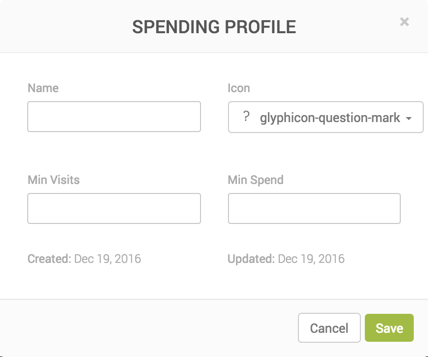
Now you will see the pop-up above with the following fields:
- Name - The name of the spend profile
- Icon - This icon will show on the customer screen to give you a quick reference to the spend profile the customer is categorized in
- Min Visits - How many visits (transactions on different days) are required in order to be categorized in this spend profile
- Min Spend - How much (sum of sales) are required in order to be categorized in this spend profile
- Created - Read-only date for information purposes
- Updated - Read-only date for information purposes
Customer Database#
If you have multi locations or multi merchants and would like to merge the customers so the same customer record appears on multiple accounts you can do so by using the customer database. In order to share customers between two locations you must have admin or supervisor access to both.
Please note, once this is done it can not be undone.

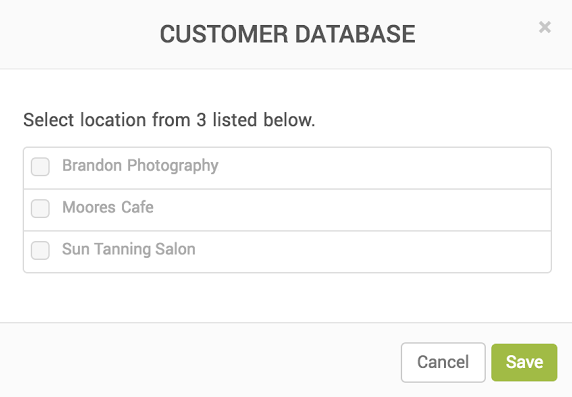
Merge customer lists to access all customers from any location. To merge customer lists with another location click the green +Change Customer Database button.

Now you will see the pop-up above with the other accounts you have access to. Use the checkboxes to the left of the location names to select the location(s) that you would like to merge customers then click the green Save button at the bottom.
*Please note this is a permanent action so once a customer list is merged with another location it cannot be undone.
Updated almost 7 years ago
