Syncing Prior Months Guide
Step One

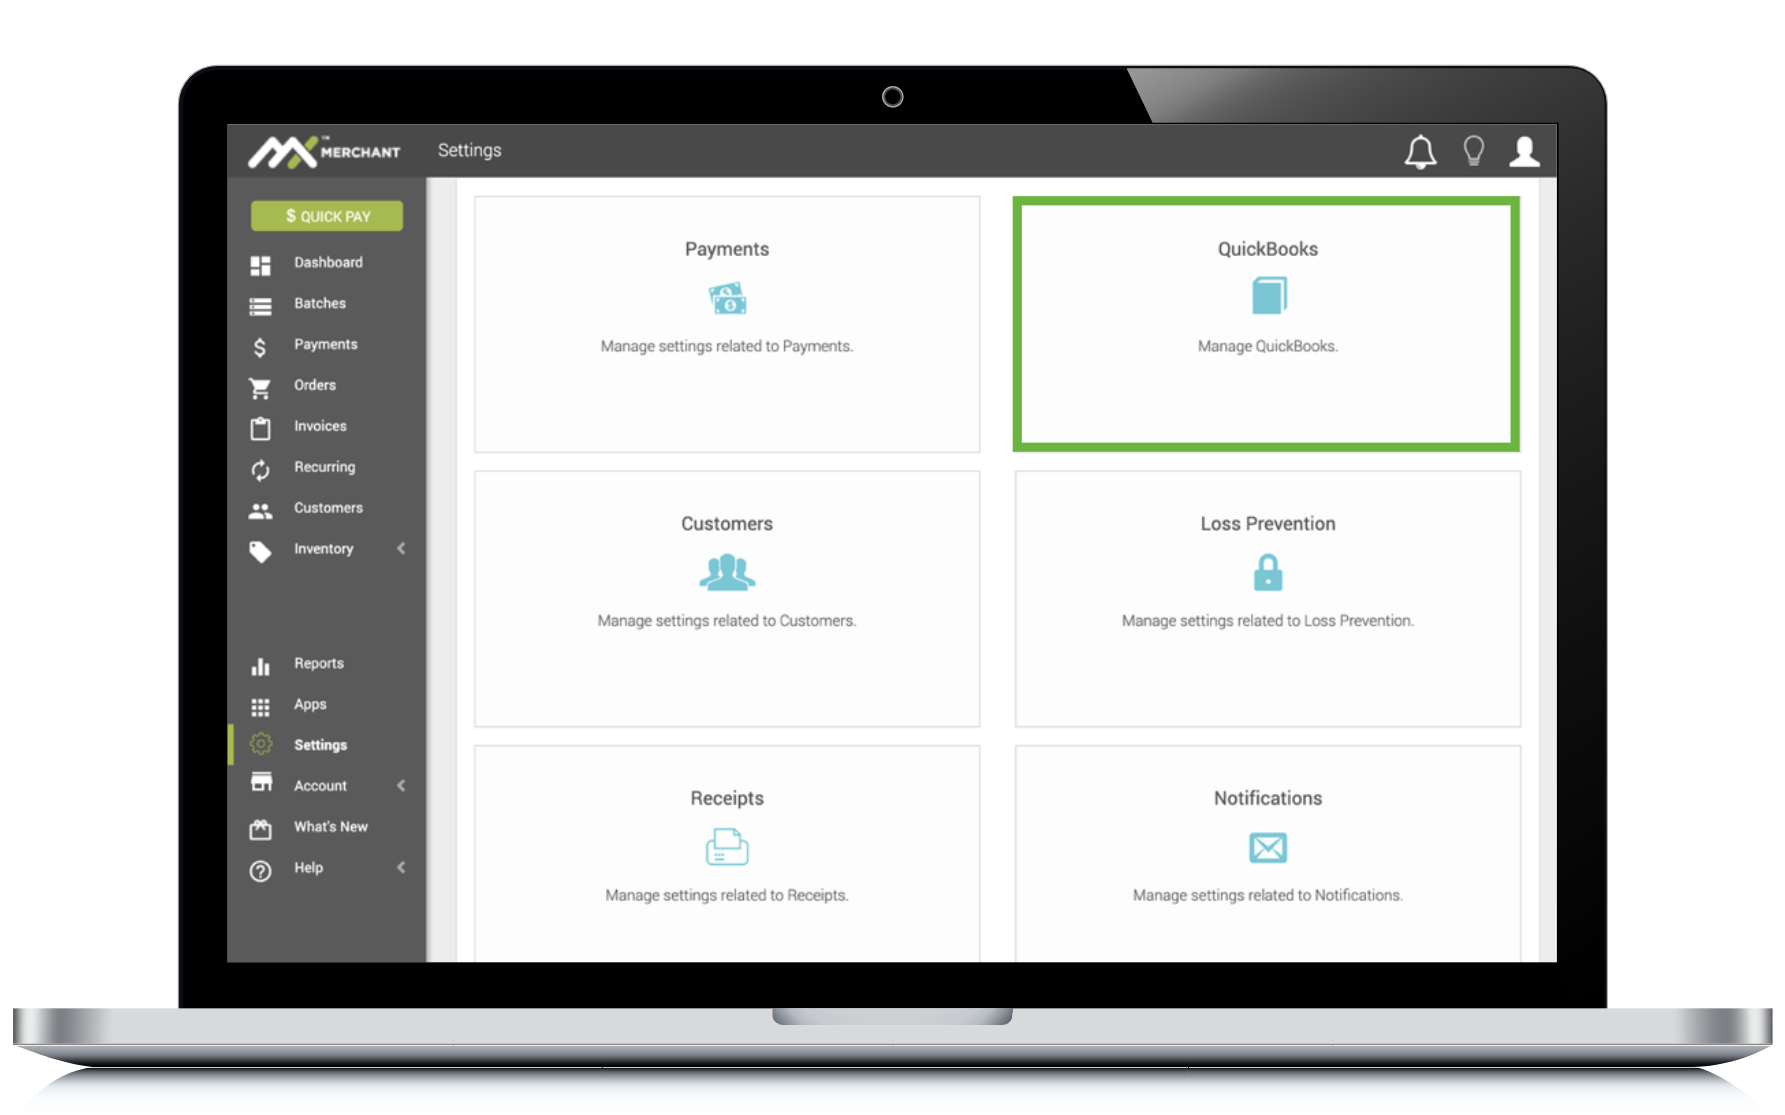
Historical data or prior months may be synchronized via the Settings found on the left-hand navigation withinMX™ Merchant. Click “Settings,” then “QuickBooks.” It is important to note that only historical months containing payments or invoices are made available to select for synchronization. Syncing prior months may take several hours.
Step Two

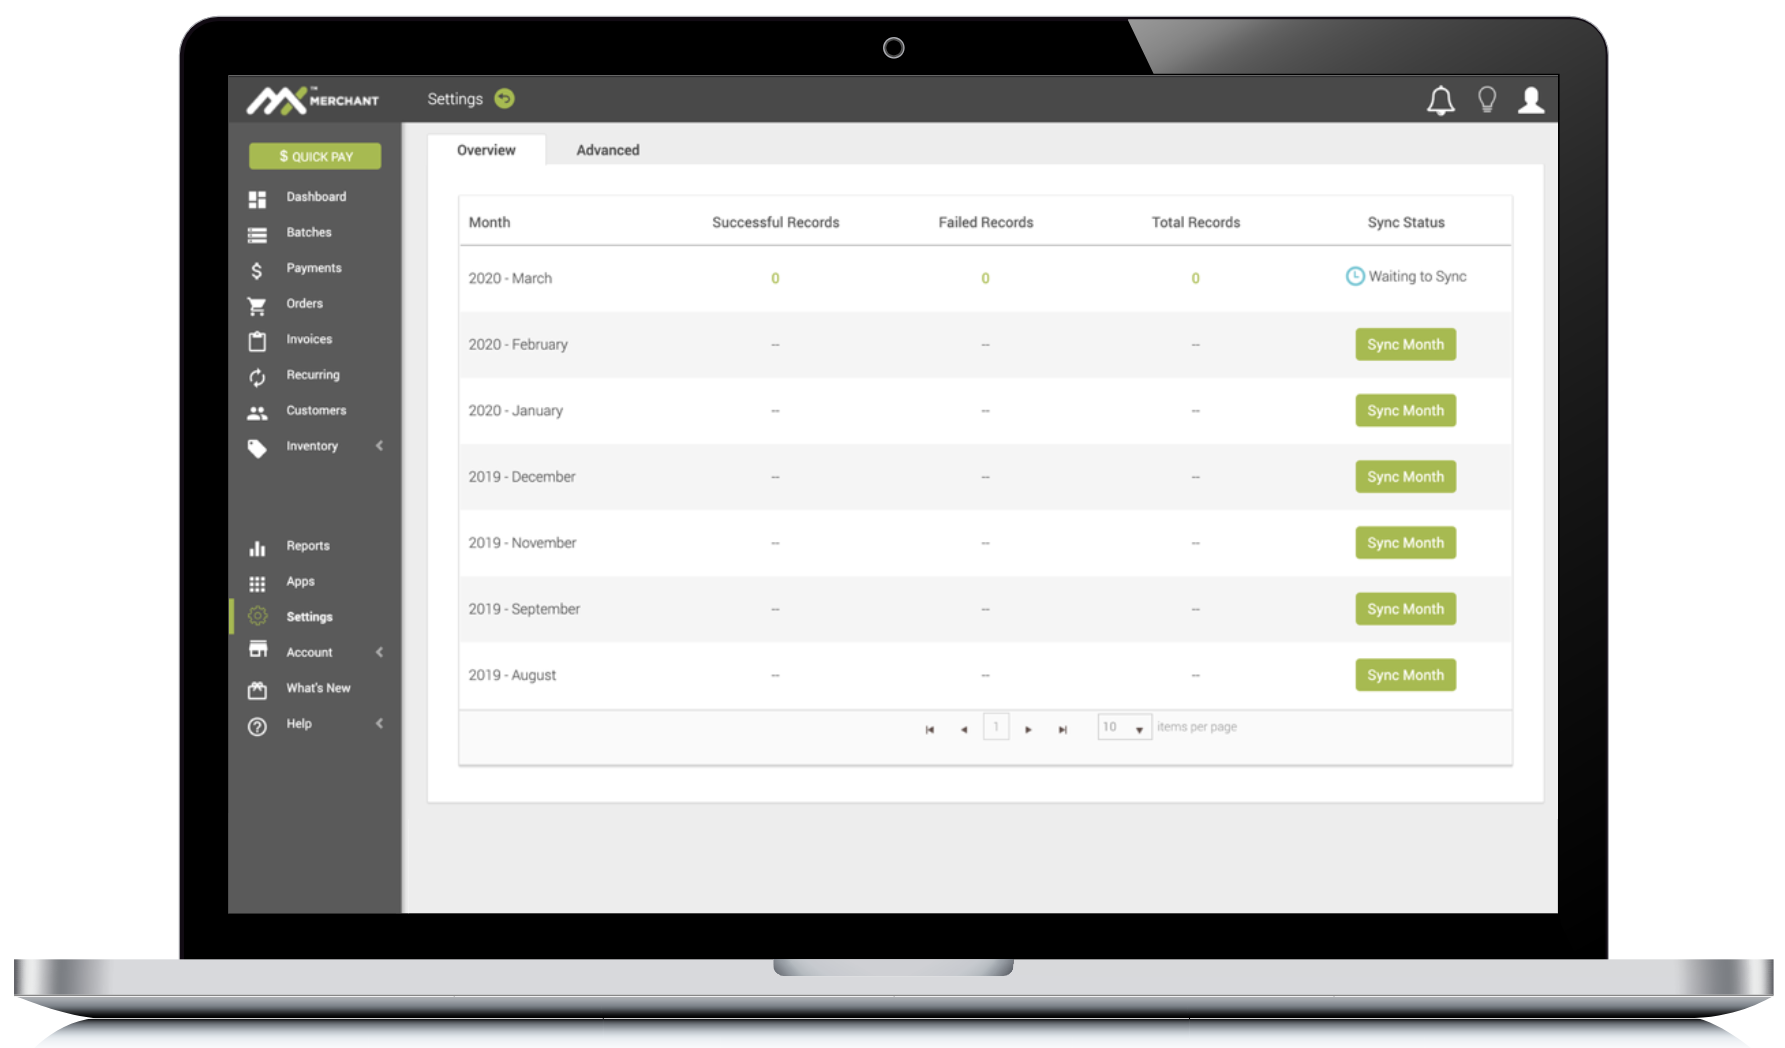
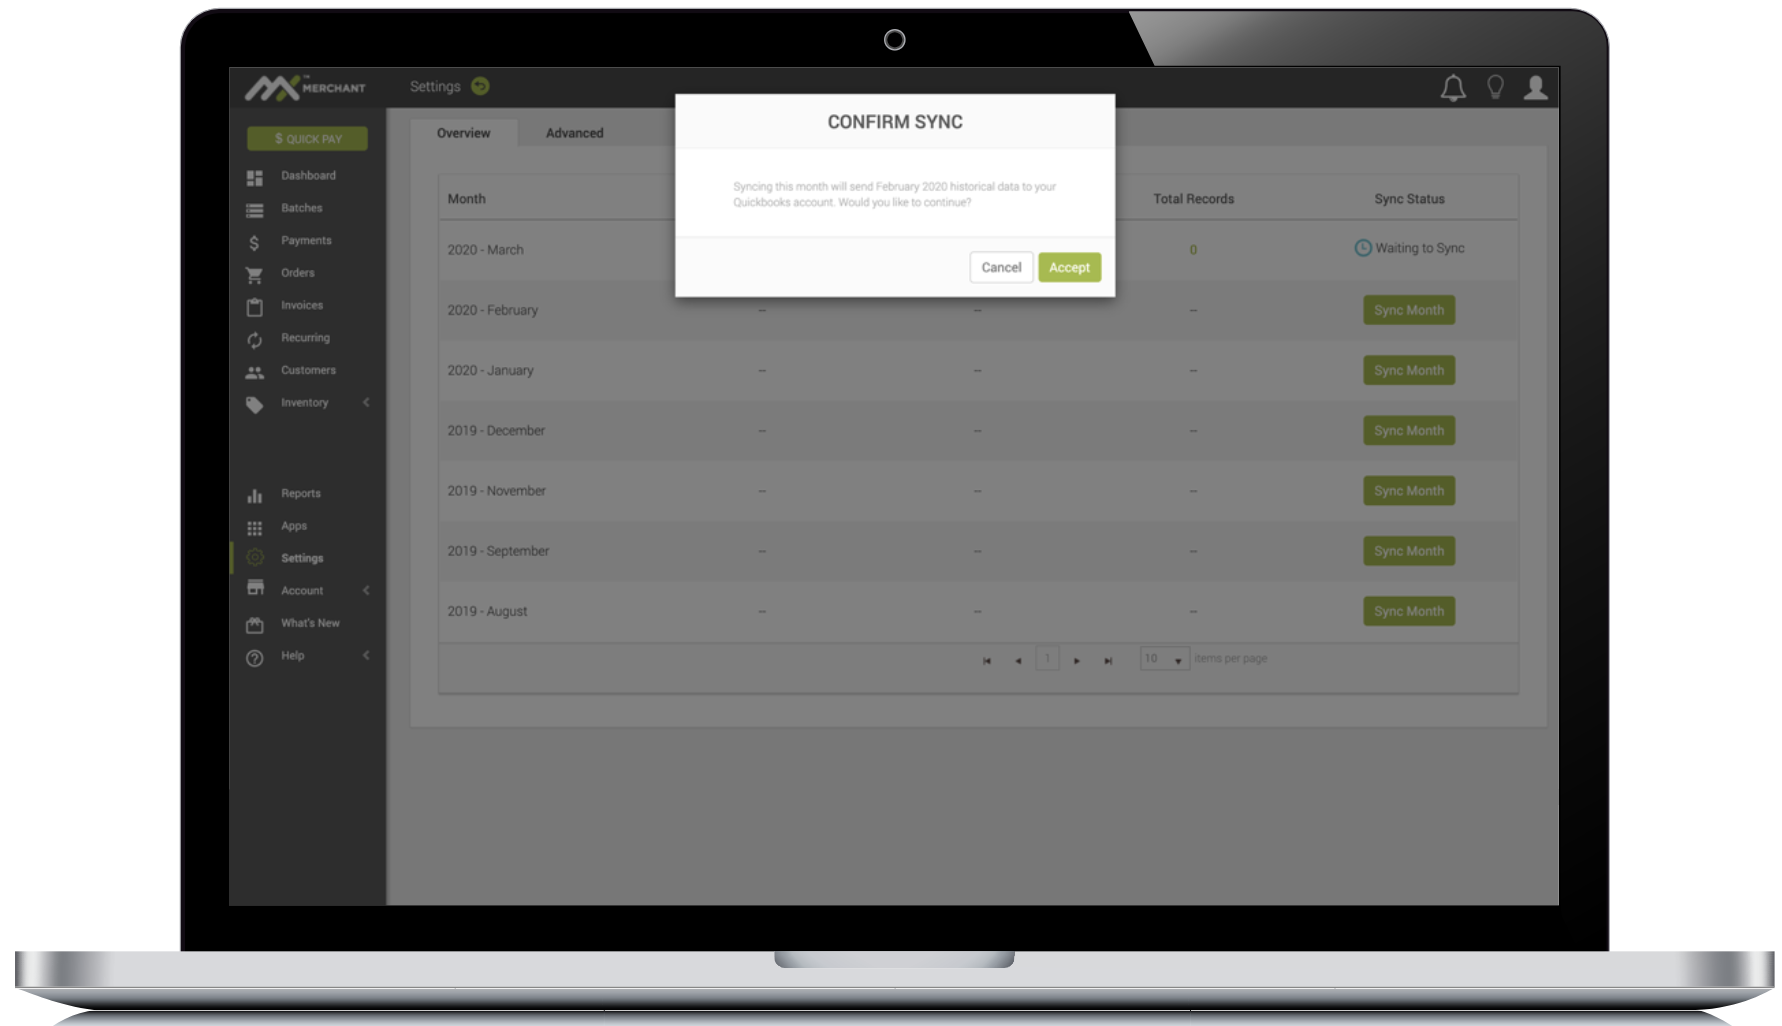
Next, you will see a list of months available for synchronization. To sync a prior month, choose “Sync Month” and the prompt shown (above) will be displayed. Choose “Accept” to agree to the synchronization and any applicable fee.
Step Three

The status for the month selected will change to “Waiting to Sync” and will begin to synchronize once it is queued for processing.
Video
To review a video of these instructions, click below:
Updated over 4 years ago
