Receipts
Receipts are the last impression your customers have of your business after their purchase. So make it a good one and customize them to best represent your hard work.
Please Note
Only the admin and supervisor can see these settings.
Receipt Types
Within MX Merchant there are 2 types of receipts depending on how you send a payment.
-
Quick Pay and Payment Link payments receive the Classic receipt.
-
Invoices, Recurring Plans, and Orders send Modern Receipts.
Classic Receipt
This is an example of the classic receipt and is sent to customers when a Quick Pay or Payment Link payment is made. On this receipt you will see the following:
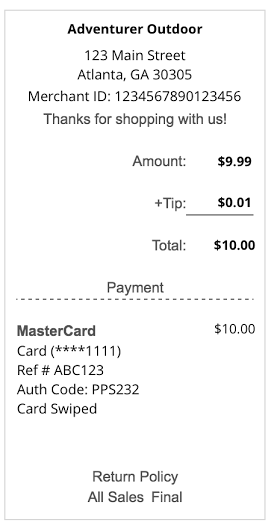
- Merchant Name - What was added to your account upon completing your paperwork. (Example: Adventure Outdoor)
- Merchant Address - Listed as the business address on your account. (Example: 123 Main Street, Atlanta, GA 30305)
- Merchant ID - Your unique Id provided to you (Example: 1234567890123456)
- Header Message - Custom you can choose to use this field or leave it blank (Example: Thanks for shopping with us!)
- Amount - The amount of the transaction (Example: $9.99)
- Tips - If there was any tips added on the Express App (Example: $0.01)
- Total - The Amount + Tips if tips were added (Example: $10.00)
- Payment information
- Card Type/Cash/Check - Tender type of the payment (Example: MasterCard)
- Amount Charged to Card - How much was charged to the card, this is important for split tenders (Example: $10.00)
- Card Last 4 - We hide all but the last 4 of the card number (Example: ****1111)
- Reference # - System generated reference number (Example: ABC123)
- Auth Code - System generated code (Example: PPS232)
- Presentment Type - Card swiped, Card present keyed, card not present (Example: Card Swiped)
- Return Policy - Custom you can choose to use this field or leave it blank (Example: All Sales Final)
Modern Receipt
This is an example of the Modern receipt and is sent to customers when an invoice, recurring plan, or order is created.
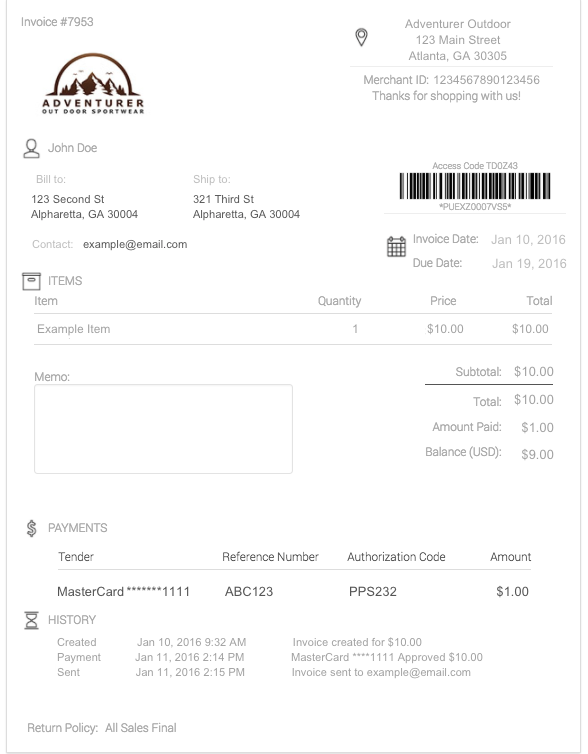
On this receipt you will see the following:
- Logo - Upload your own in receipt settings
- Merchant Name - Merchant name on account (Example: Adventure Outdoor)
- Merchant Address - Listed as the business address on your account. (Example: 123 Main Street, Atlanta, GA 30305)
- Merchant ID - Your unique Id provided to you (Example: 1234567890123456)
- Header Message - Custom you can choose to use this field or leave it blank (Example: Thanks for shopping with us!)
- Customer - Customer name, billing, shipping, and contact information (this will only show if provided during creation)
- Invoice Date - Date the invoice was sent
- Due Date - Date payment from customer is required by
- Items - The item name, quantity, price, and total for each
- Memo - Will only show if added prior to sending.
- Calculations - Subtotal, total, amount paid, balance due
- Payments
- Tender - Card/Cash/Check (Example: MasterCard)
- Reference # - System generated reference number (Example: ABC123)
- Auth Code - System generated code (Example: PPS232)
- Amount Charged to Card - How much was charged to the card, this is important for split tenders (Example: $1.00)
- Presentment Type - Card swiped, Card present keyed, card not present (Example: Card Swiped)
- History - If you choose to show the history and payment these two sections will show.
- Return Policy - Custom you can choose to use this field or leave it blank (Example: All Sales Final)
What You'll See
Okay now that you know what the receipts look like, let's jump back to the settings and customization.
This page is broken up by the following sections:
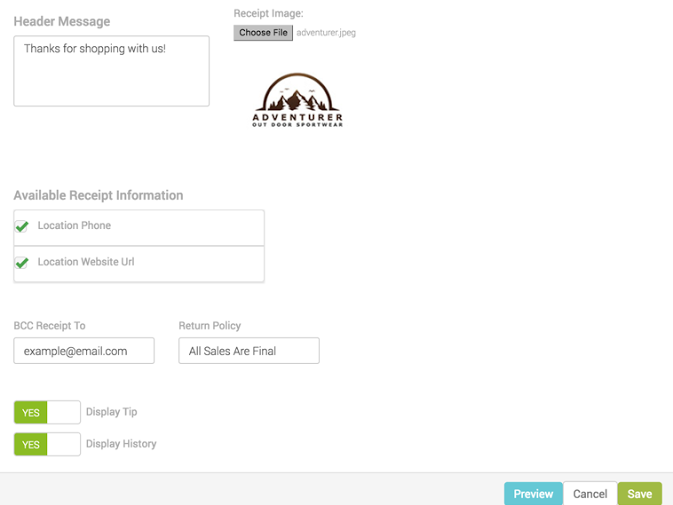
- Header Message
- Receipt Image
- Available Receipt Information
- BCC Receipt To
- Return Policy
- Display Tip
- Display History
- Preview
Header Message
The header message is a great place to add a friendly message to the customer or any additional information you feel all customers should see. This is a free form text box, enter as much as you would like in this field.
Please remember that if you add a lot of information in this field it will shift the look of your receipt.
Receipt Image
Customize your receipt and add a picture of your logo to the top of the modern receipts that you send.
To add a new receipt image:
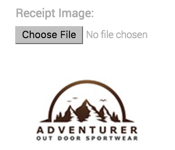
- Click on the gray Choose File button.
- Your computer files pop up should appear where you can select the file from your computer
- Choose and click open on the pop-up
- The file will be loaded and you will see the preview just below the Choose File button.
To change the photo just click the Choose File button and select a new image.
Available Receipt Information
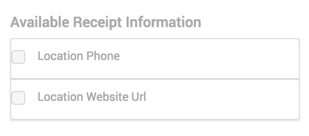
Use the check-boxes to select if you would like to show your business phone number and location website URL on the top of your receipts. Leaving the boxes unchecked will keep this information from being displayed.
BCC Receipt Information
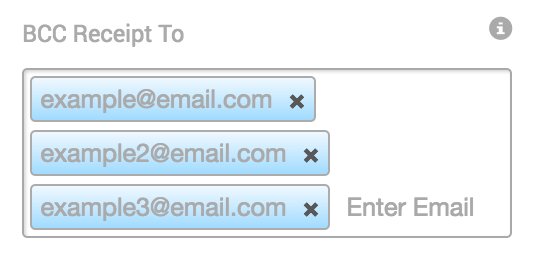
The BCC receipt information field will send a copy of every transaction receipt that is made through MX Merchant on this account to the email address specified.
Don't worry the customer never sees your email address but it is a way for you to receive full payment details on each payment.
To add more than one email address to receive a copy of the receipts simply click the space, comma, or enter button on your keyboard then start typing in the next email address.
Please note only one email address can be entered in this field.
Return Policy

The Return Policy is located at the bottom of the receipt, use this field to inform your customers of your return requirements so be as descriptive or brief as you want. (Example: Returns must be made within 30 days of receipt date, with tags and receipt)
If you don't want the return policy to appear just leave it blank.
Display Tip

MX Express (iPhone/iPad) and MX Retail (iPad) allow customers to add tip during checkout. Turning to Yes will show tips on the Classic receipts that are printed from those apps. Choosing No will not display tips even if tips are provided.
Display History

Displaying history is for the Modern receipts that come from invoices, recurring plans, and orders. History contains when it was created, sent, updated, and payments were made. If you want your customers to see this information turn the toggle to Yes, if not switch it over to No.
Preview
Now that you have made all the necessary changes, click the blue preview button at the bottom right of the screen. Here it will show you both the classic and modern receipt based on the changes you made. If you like it, close out of the pop-up and click the green save button at the bottom of the screen.
Updated over 5 years ago
